To deploy the management webapp, we have to copy the application we just built with Maven into Tomcat’s webapps directory., And, to make sure everything stays in sync, it probably makes sense to (re)copy the CAS server application into webapps as well. We also have to copy the new and updated files in etc/cas from both the cas-management-overlay and cas-overlay-template directories.
Update the distribution tar file creation script
Earlier, we created a shell script to handle building the distribution tar file (if you didn’t do this then, now is the time to do it). That script can be extended to combine the necessary components of both the cas-overlay-template and the cas-management-overlay into a single tar archive. Edit your cassrv-tarball.sh script and update/replace its contents so that it looks something like this:
#!/bin/sh

WORKSPACE=/opt/workspace
SERVER=${WORKSPACE}/cas-overlay-template
WEBAPP=${WORKSPACE}/cas-management-overlay

tar czf /tmp/cassrv-files.tgz --owner=root --group=tomcat --mode=g-w,o-rwx \
    -C ${SERVER} etc/cas \
    -C ${SERVER}/target cas --exclude cas/META-INF \
    -C ${WEBAPP} etc/cas \
    -C ${WEBAPP}/target cas-management --exclude cas-management/META-INF

echo ""

ls -asl /tmp/cassrv-files.tgz
exit 0
Update the installation shell script
When we created the original cassrv-tarball.sh script, we also created a cassrv-install.sh script to manage shutting down Tomcat, deleting the old contents of /etc/cas, deleting the old copy of the CAS server application (and any associated runtime files), extracting a new copy of the application from the tar archive, and restarting Tomcat. That script can also be extended to handle both the CAS server and the management webapp. Edit your cassrv-install.sh script and update/replace its contents so that it looks something like this:
#!/bin/sh

echo "--- Installing on `hostname`"
umask 027

if [ -f /tmp/cassrv-files.tgz ]
then
    systemctl stop tomcat

    cd /

    # Only delete/replace etc/cas/services if management webapp is
    # not already installed
    if [ ! -d /opt/tomcat/latest/webapps/cas-management ]
    then
        rm -rf etc/cas/config etc/cas/services
        tar xzf /tmp/cassrv-files.tgz etc/cas
    else
        rm -rf etc/cas/config
        tar xzf /tmp/cassrv-files.tgz etc/cas --exclude etc/cas/services
    fi

    chmod -fR g+w etc/cas/services
    chmod -f g+w etc/cas/saml

    cd /opt/tomcat/latest/
    rm -rf webapps/cas work/Catalina/localhost/cas
    rm -rf webapps/cas-management work/Catalina/localhost/cas-management

    cd /opt/tomcat/latest/webapps
    tar xzf /tmp/cassrv-files.tgz cas cas-management

    systemctl start tomcat

    rm -f /tmp/cassrv-files.tgz /tmp/cassrv-install.sh
    echo "Installation complete."
else
    echo "Cannot find /tmp/cassrv-files.tgz; nothing installed."
    exit 1
fi

exit 0
Install and test on the master build server
Use the new scripts created above (or repeat the commands) to install the management webapp and updated CAS server files on the master build server (casdev-master) and restart Tomcat:
casdev-master# sh /opt/scripts/cassrv-tarball.sh
casdev-master# sh /opt/scripts/cassrv-install.sh
---Installing on casdev-master.newschool.edu
Installation complete.
casdev-master#
Review the contents of the log files (/var/log/tomcat/catalina.yyyy-mm-dd.out and /var/log/cas/cas.log) for errors.
Install on the CAS servers
Once everything seems to be running correctly on the master build server, it can be copied to the CAS servers, again using the scripts above:
casdev-master# sh /opt/scripts/cassrv-tarball.sh
casdev-master# for host in srv01 srv02 srv03
> do
> scp -p /tmp/cassrv-files.tgz casdev-${host}:/tmp/cassrv-files.tgz
> scp -p /opt/scripts/cassrv-install.sh casdev-${host}:/tmp/cassrv-install.sh
> ssh casdev-${host} sh /tmp/cassrv-install.sh
> done
casdev-master#
Shut down all but one of the pool servers
Operating CAS with a pool of servers instead of a single server requires special configuration. Because that configuration hasn’t been completed yet, testing must be performed against a single server. Therefore, the other servers in the pool should be shut down so that the load balancer will direct all traffic to that single server. Run the command
# systemctl stop tomcat
on all but one of the CAS servers (casdev-srvXX) to temporarily take those servers out of the pool.
Access the webapp
Open up a web browser (in “incognito” or “private browsing” mode) and enter the URL of the management webapp:
https://casdev.newschool.edu/cas-management
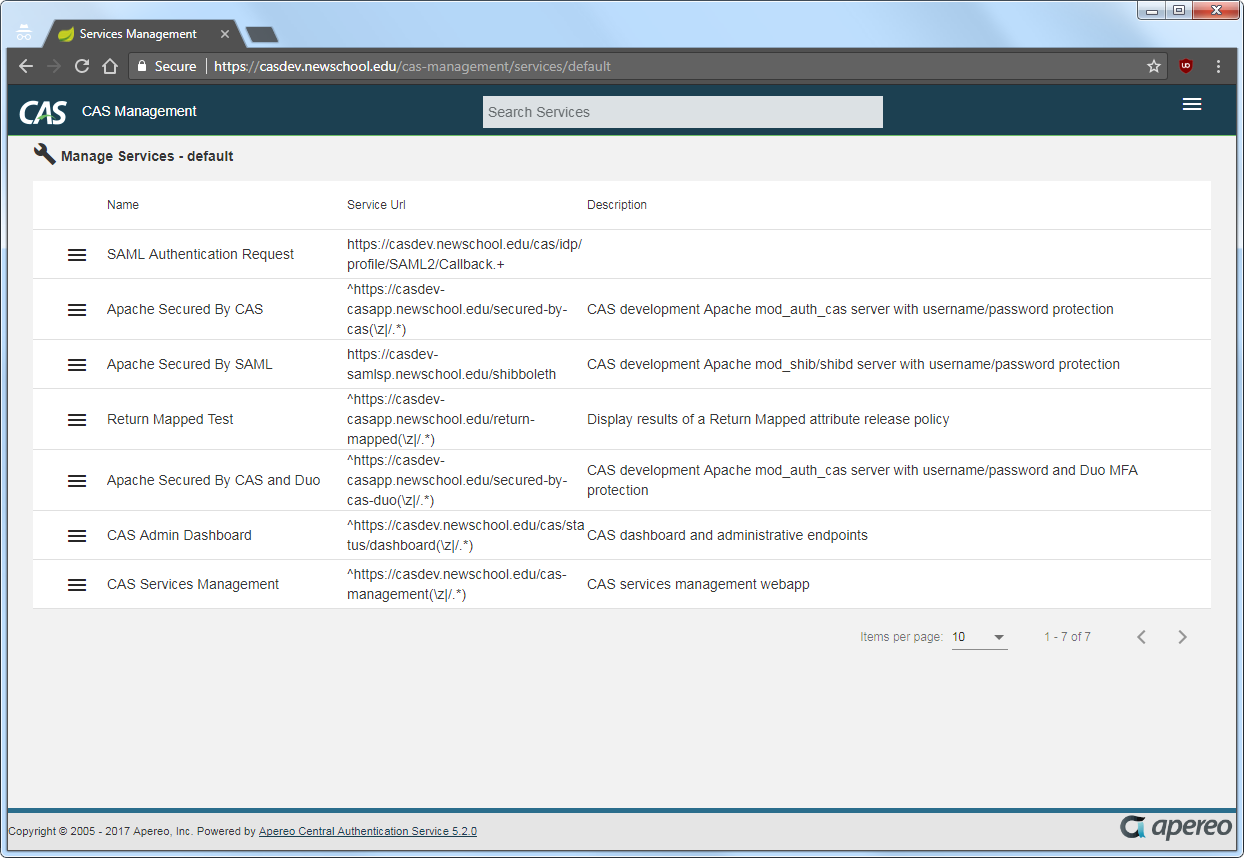
and authenticate as a user listed in the /etc/cas/config/admusers.properties file. The default screen of the management webapp, which shows a list of all configured services sorted by order of evaluation, should appear and look something like Figure 22.
Try editing a service registry entry
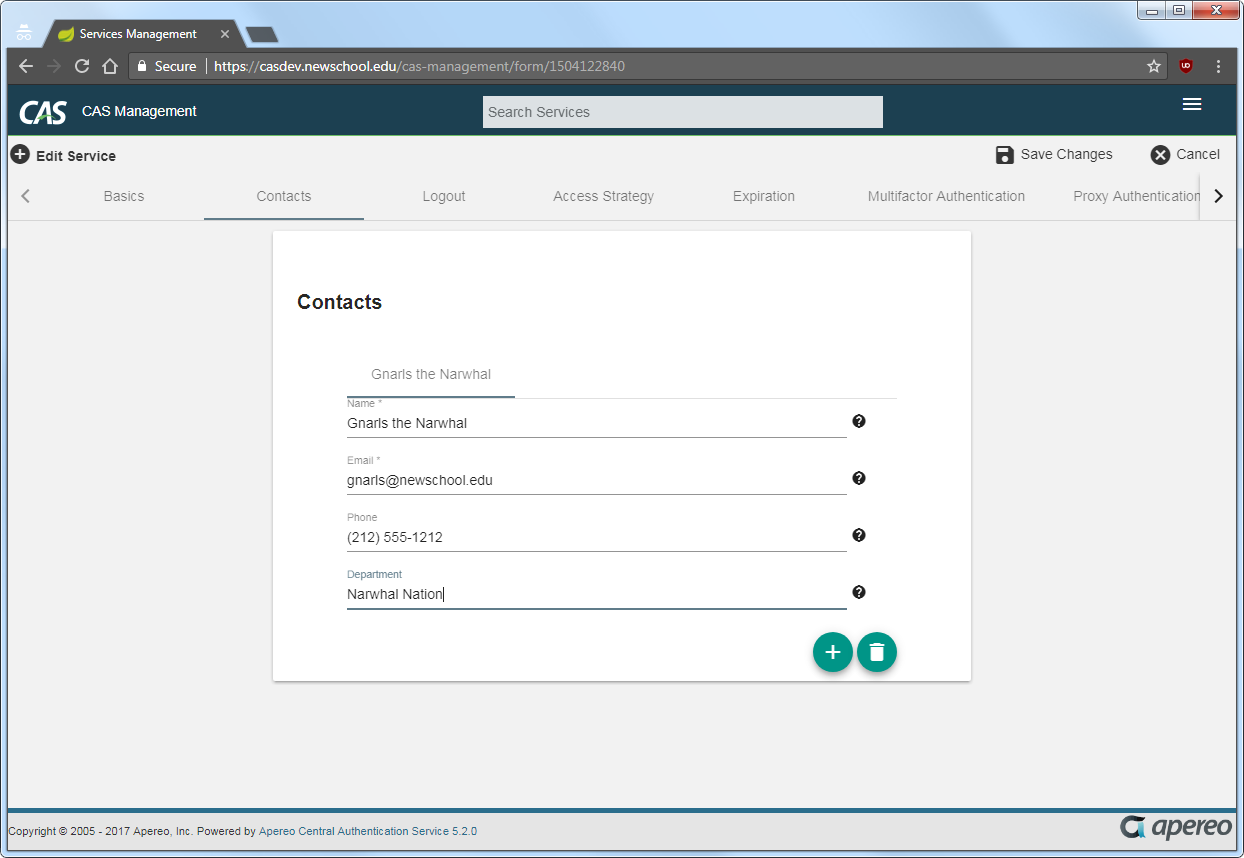
Select “Edit” from the menu at the left of one of the service definitions (it doesn’t matter which one), and then browse the various tabs across the top of the window to see how all the various aspects of the service definition can be viewed and edited in the webapp. Then select the “Contacts” tab, and try updating the contact information for the service, as shown in Figure 23.
Click the “Save Changes” button at the top right of the window, and verify that the changes can be successfully saved (a message will appear at the bottom of the window). Check the log file (/var/log/cas/cas.log) and the contents of the changed service definition in /etc/cas/services, too.
Try creating a service registry entry
Select “Add New Service” from the menu at the top right of the page and fill in the “Basics” screen (the values don’t really matter). Then click “Save Changes” and verify that a new service registry definition was successfully created. Check the log file and /etc/cas/services, too.
Back on the default page (list of services), select “Delete” from the menu at the left of the service definition you just created, and confirm the deletion. Then verify that the service was indeed deleted.
Restart the pool servers
One testing is complete, run the command
# systemctl start tomcat
on each of the pool servers shut down previously.