Before distributing the Tomcat installation to the CAS servers, it should be tested on the master build server (casdev-master) to ensure that everything is working properly.
Modify the ROOT web application to identify the server and client
Before starting the testing, edit the file /opt/tomcat/latest/webapps/ROOT/index.jsp and find the “congrats” section (around line 51):
<div id="congrats" class="curved container">
    <h2>If you're seeing this, you've successfully installed Tomcat. Congratulations!</h2>
</div>
Insert the text shown below to display the host name, IP address, and port number of the Tomcat server:
<div id="congrats" class="curved container">
    <h2>If you're seeing this, you've successfully installed Tomcat. Congratulations!</h2>
    <p>Server:
       <%= request.getLocalName() %> /
       <%= request.getLocalAddr() %> /
       <%= request.getLocalPort() %></p>
    <p>Client:
       <%= request.getRemoteHost() %> /
       <%= request.getRemoteAddr() %> /
       <%= request.getRemotePort() %></p>
</div>
This will be helpful later when testing the CAS servers through the load balancer, to ensure that requests are being distributed across the server pool, and also to ensure that X-Forwarded-For header processing is working correctly.
Start Tomcat
Start the Tomcat server by running the command
casdev-master# systemctl start tomcat
Review the contents of the log file (/var/log/tomcat/catalina.yyyy-mm-dd.out) for errors. All log messages in a successful start should be at log level INFO. If any messages are at log level WARNING or SEVERE, then something is wrong and needs to be corrected.
disableSessionTickets property (setting it to true). This is necessary to avoid a bug in Tomcat’s JSSE with OpenSSL implementation (BugID 59811). However, including the property will cause this warning message to appear:DD-MMM-YYYY HH:MM:SS.sss WARNING [main] org.apache.tomcat.util.net.SSLHostConfig.setConfigType The property [disableSessionTickets] was set on the SSLHostConfig named [_default_] and is for connectors of type [OPENSSL] but the SSLHostConfig is being used with a connector of type [EITHER]This warning message is being printed erroneously (as configured, the JSSE connector is using OpenSSL) and should be ignored.
The last line of the log file in a successful start should look like this:
DD-MMM-YYYY HH:MM:SS.sss INFO [main] org.apache.catalina.startup.Catalina.start Server startup in N ms
Check that the Tomcat Native Library was correctly installed
After reviewing the log file in general, look specifically for messages that the Tomcat Native Library was successfully loaded and that it’s using the OpenSSL library:
DD-MMM-YYYY HH:MM:SS.sss INFO [main] org.apache.catalina.core.AprLifecycleListener.lifecycleEvent Loaded APR based Apache Tomcat Native library [1.2.12] using APR version [1.6.2].
DD-MMM-YYYY HH:MM:SS.sss INFO [main] org.apache.catalina.core.AprLifecycleListener.initializeSSL OpenSSL successfully initialized [OpenSSL 1.1.0f  25 May 2017]
If instead a message like this appears:
DD-MMM-YYYY HH:MM:SS.sss INFO [main] org.apache.catalina.core.AprLifecycleListener.lifecycleEvent The APR based Apache Tomcat Native library which allows optimal performance in production environments was not found on the java.library.path: /usr/java/packages/lib/amd64:/usr/lib64:/lib64:/lib:/usr/lib
then the Native Library was not installed correctly, and the installation needs to be fixed.
Access the ROOT web application
Open up a web browser and enter the URL of Tomcat’s TLS port on the master build server:
https://casdev-master.newschool.edu:8443
Expect the browser to complain about the TLS/SSL certificate because the host name of the server does not match the name in the certificate. Click through the prompts to visit the site anyway, and you should see something like Figure 3, below:
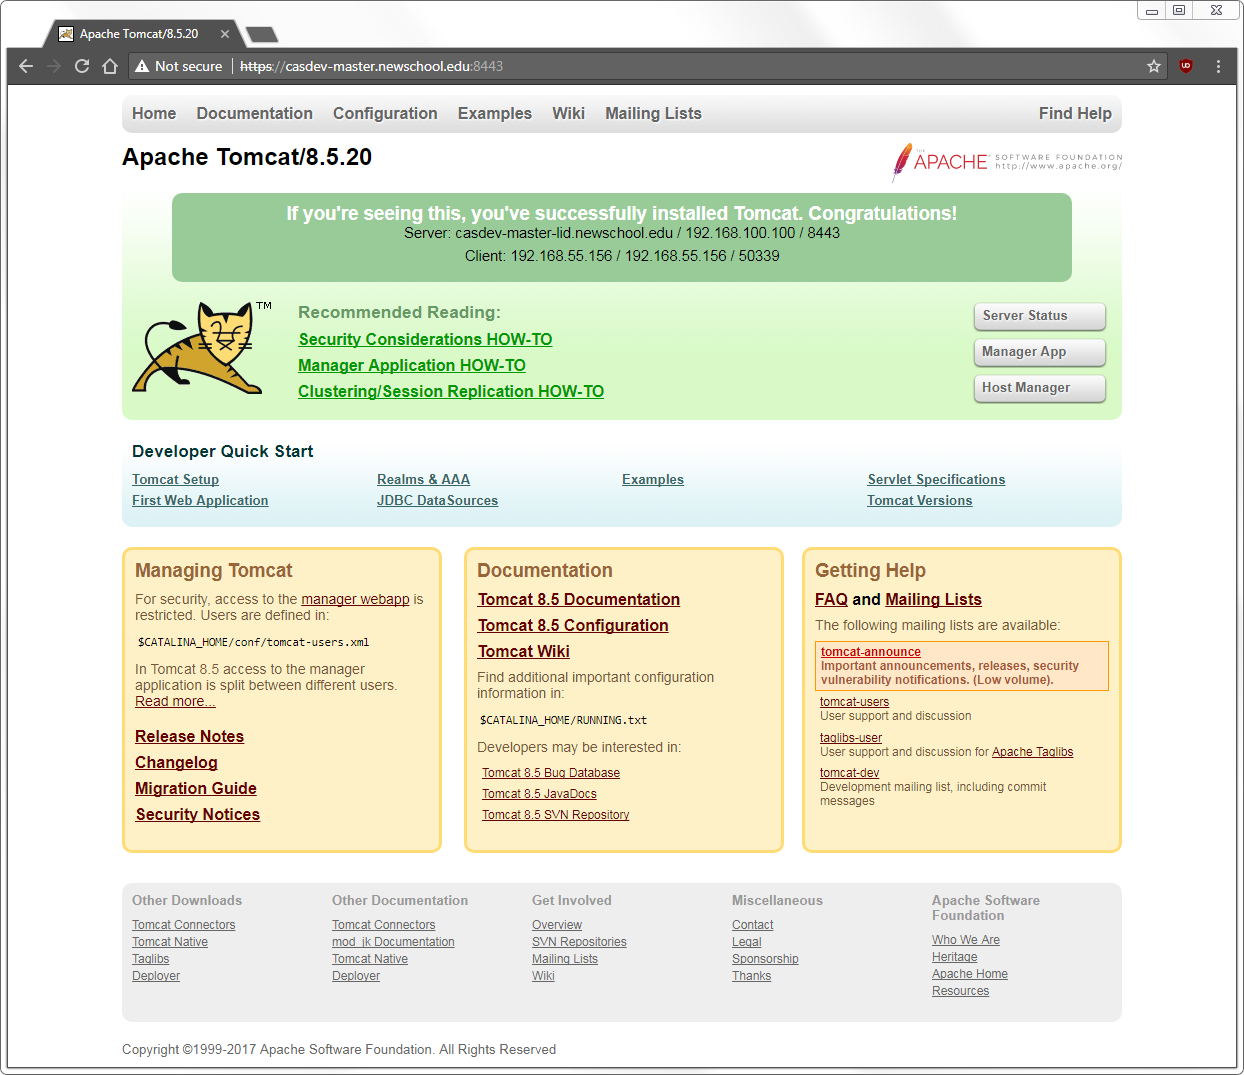
Notice the host name, IP address, and port number of the server and client displayed in the top (dark green) section; this will be important when testing through the load balancer later.
Using the features of your web browser, examine the details of the TLS certificate. (In Google Chrome, this is done by typing Ctrl+Shift+I to bring up the Developer Tools window, selecting the “Security” tab, and clicking “View certificate.”) Check that the certificate is the one created and installed in Configure TLS/SSL settings and that the certificate chain is valid from the root to the certificate.